Yup, my first wedding cake! Back in January a friend of mine got married, and when he began planning, I jumped at the opportunity. “I can bake your wedding cake! Only if you want me to…” I was a little unsure at what I was volunteering myself for. Never did it cross my mind that I hadn’t the slightest idea on how to make a wedding cake and how much work it would be. Not to mention I didn’t know anything about tiered cakes. Or how large a cake it takes to feed hundreds of people. So I thew in a tiny disclaimer at the end. “You don’t have to feel obligated to say yes.” But secretly I wanted to, badly. What kind of wedding doesn’t have a tower of butter and sugar to celebrate with? People make wedding cakes all the time, you see it all over television, I’m sure I can throw something together, right? I persuaded them: “You must have a cake.”
The couple agreed, and the job was mine! My mind started churning months before the wedding with flavors, fillings, materials I needed to collect, weekly trips to Michaels to use coupons and find cake decorating supplies on clearance, and countless hours on YouTube watching cake making tutorials, I kid you not. Allow me introduce to you my good friend Edna, my virtual cake tutor, who has taught me over and over (x15) again how wedding cakes are frosted and put together. Even now I can still hear her voice in my head. Here are just a few of the supplies gathered:
And a very cool place that I discovered — Restaurant Depot. I started putting all these things in my cart and then came to the realization that I was making one wedding cake, but my cart had supplies to make 100. I have to seriously curb my addiction for buying bulk (you don’t know how excited I get when I go to Costco). I walked up and down every aisle, and yes, I even busted out my camera too:
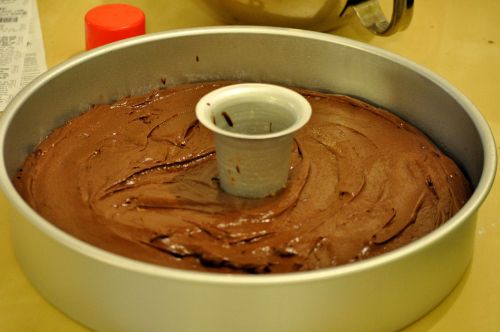
The couple had chosen the flavors of chocolate and strawberry, and red velvet. Since it was going to be a three tiered cake, I decided that the large 14″ bottom layer would be chocolate, and the top two tiers, 10″ and 6″, would be red velvet. Here’s round one with layer one of tier one:
Wilton suggests using a heating core for all cakes 10″ and larger, which is what’s in the center of the cake. That way the cake bakes evenly, and it’s not raw in the middle and burnt on the edges. Here’s the middle red velvet layer after it came out of the oven:
Each tier had 3 layers (9 layers total), and because I only had 1 pan of each size, the baking alone took me 4 nights. I started baking the Monday before the Saturday wedding, and everyday I’d come home from work, change, and start baking like a mad woman. Dinner was eaten while a layer was baking in the oven, and once it was out, I’d keep track of the cooling time, flip it out, wash the pan and my mixer bowl, and start all over again. Showering took place either during cooling time or baking time, and when bf called to ask how my day was, the answer was short: “Work and bake.” He stopped asking by the second night. All layers were done and completed by Thursday night, which was right on schedule. I took the day off work on Friday, and the entire day would be spent assembling the layers, making the frosting, and putting the whole thing together.
Stay tuned for Part 2– Assembly!
Too Much Chocolate Cake
Adapted from AllRecipes – this recipe can be made with any flavor cake mix to make it rich and moist
- 1 (18.25 ounce) package devil’s food cake mix
- 1 (5.9 ounce) package instant chocolate pudding mix
- 1 cup sour cream
- 1 cup vegetable oil
- 4 eggs
- 1/2 cup warm water
-
Preheat oven to 350 degrees F.
- In a large bowl, mix together the cake and pudding mixes, sour cream, oil, beaten eggs and water. Pour batter into a well greased 12 cup bundt pan.
- Bake for 50 to 55 minutes, or until top is springy to the touch and a wooden toothpick inserted comes out clean. Cool cake thoroughly in pan at least an hour and a half before inverting onto a plate.
Red Velvet Cake
Adapted from Martha Stewart
Makes 5 cups Batter
- Preheat oven to 350 degrees. Grease pan and line with parchment paper. Dust with cocoa, tapping out excess. Set aside. Whisk together flour, salt, and cocoa in a medium bowl; set aside.
- Mix sugar and oil on medium speed in the bowl of an electric mixer fitted with the whisk until combined. Add eggs one at a time; mix well after each addition. Mix in food coloring and vanilla. Add flour mixture in 3 batches, alternating with the buttermilk and beginning and ending with flour, mixing well after each addition. Scrape down sides of bowl as needed.
- Stir together baking soda and vinegar in a small bowl. Add baking-soda mixture to batter, and mix on medium speed 10 seconds. Pour batter into prepared pans. Bake until a cake tester inserted into centers comes out clean, 30 to 35 minutes. Let cool completely in pans on wire racks.
Multiply the recipe a bunch of times and keep filling up the baking pans!
– Ai


Hi I just wanted to leave a comment to say that I enjoy your blog. Congratulations on a very popular site.
Thanks