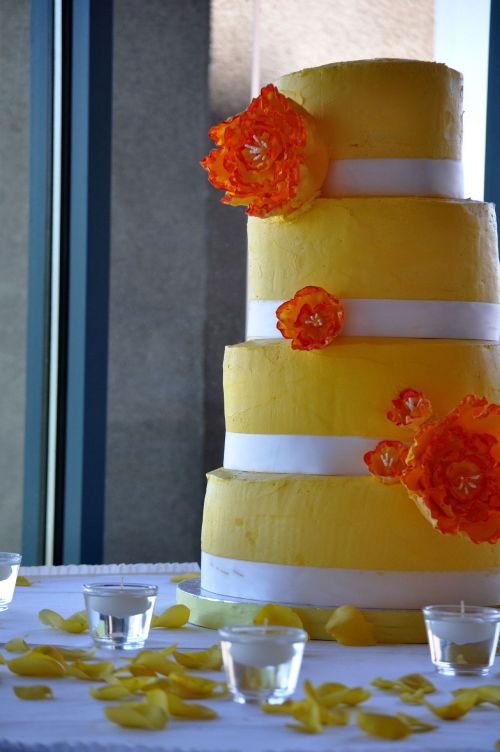
Wedding Cake: Elizabeth and Chris

Elizabeth and Chris just celebrated their 6 month anniversary – and that is how behind I am on posting.

Their wedding day was on a gorgeous September Saturday at a beautiful winery in Geyserville, California. The weather was perfectly sunny with a crisp chill, which is the ultimate cake-baking weather. Elizabeth and Chris chose chocolate mocha and lemon raspberry as their two flavors of choice.

Everything for this wedding cake went smoothly, until it came time to transport it. I loaded up my friend’s hatchback with the cake, my flower friend (and roommate, she does all the flowers for my cakes), my chauffeur (who is also the owner of the hatchback), loads of extra frosting and piping bags, and we set off for the 100 mile journey.

Huge lessons learned here. Lesson one – wedding cakes do not like road trips. We had to drive under the speed limit with a 3 tier cake in the back, so what google maps tells me is an 1 hour 40 min drive will actually result in a 2 hour 50 min drive. Throw in unexpected road construction, 1 road-side stop in the beginning to readjust the cake sliding around in the back, plus a desperate gas station bathroom stop which doubled as a “quick, open up the back and let me fix the top tier because half of it is falling off”. Part of the top fell somewhere within the first 1.5 hours and until we stopped, I had to force myself not to turn around and look at the cake, because everytime I did I had a mini heart attack freak-out. If you were one of the folks who happen to be filling up at that gas station we stopped at, I sure did give you a lot to stare at with the hatchback open and me frantically re-frosting a cake. Which brings me to lesson two: always bring loads of extra frosting, your offset spatula, and plenty of paper towels. I am so thankful I did.

Lesson three – bring a jacket. We drove the entire way with the air conditioner on full blast for the sake of the cake, and I was wearing a short-sleeved shirt and jeans. No doubt I was freezing my toosh off and slapping myself for forgetting my jacket. When you’re cold and shivering, your hands start to shake. Or it could have been because I was nervous. Or running late. Or lacking a weeks worth of sleep. Anyway, trying to decorate a cake with shaking hands is not a pretty sight. The cake table on site was also in the middle of the room with the ceremony right outside, so guests were also watching me decorate, which quadrupled my anxiety.

But after all was conquered, the wedding cake ended up alive and well. It was actually a very scenic and beautiful drive up to wine valley too, had I taken a moment to stop and soak it in. Elizabeth filled me in after the honeymoon to let me know that everyone enjoyed the cake, which made it all worth it. She even facebooked me a picture of her friend trying to sneak a lick of frosting before it was cut! Hilarious.

Congrats Elizabeth and Chris, and happy half-year anniversary too – Biz, you were stunning, and I’m thrilled to have been part of your wedding day!

– Ai

*All photographs in this post are courtesy of Bella Pictures Wedding Photography

Rainbow Cake

New Year’s Resolution: blog more often.

That’s one of many on the list. The last half of 2010 has been crazy, juggling two jobs on top of everything else that comes with normal life. My free time was limited, and when I did find time, I had two options: bake… or blog. I usually sided with baking something new, since that was more theraputic and blogging requires thinking. Call me lazy – thus creating a backlog up the wazoo of new stuff to blog, and an ever increasing folder on my desktop titled with all caps: NEED TO BLOG.

But I’m excited to say that life in 2011 will be different. I’m leaving my current sales job in San Francisco, and doing a huge career change, which means I’m going back to school! This was a decision that was placed on my heart a couple of months ago, and the boldness of it scared my pants off. After much prayer, doing tons of research, and talking with super supportive friends and family, I jumped at it, enrolled in school, and next week will be my last one at work. Hooray! For anyone that’s ever done a career change, it’s an emotional rollercoaster with lots of anxiety, excitement, and anticipation of what’s ahead. You’re never too old to go back to school, right? You betcha. 

Along with being a full-time student, I’ll still be working my job as  a cupcake baker. You can’t keep me out of the kitchen, and I figure that after studying on my butt all day, it’ll be good to be on my feet, work with my hands, and bust out cupcakes like no other. I’m not quite sure if my schedule will be busier now than before, but don’t worry friends, I’m still blogging, be it ever so gradually.

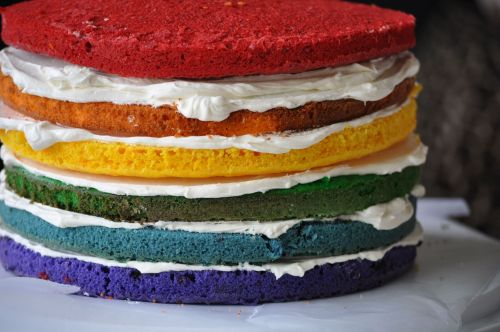
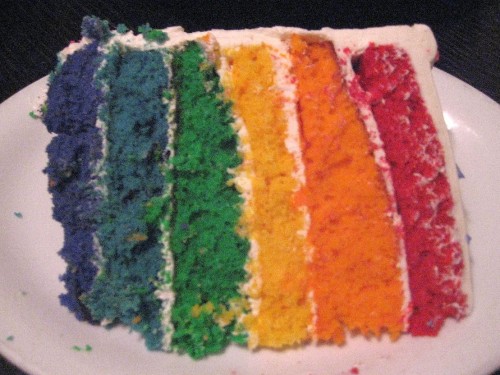
When my eyes first laid sight of this rainbow cake on Cheeky Kitchen (click link for recipe), it was an immediate bookmark and on my list for the next birthday in line. So when one of my youth group girls’ sweet 16 came up, it took me half a second to know what to bake for her. The colors are so vibrant, and each layer has its own fruity distinctiveness to it.


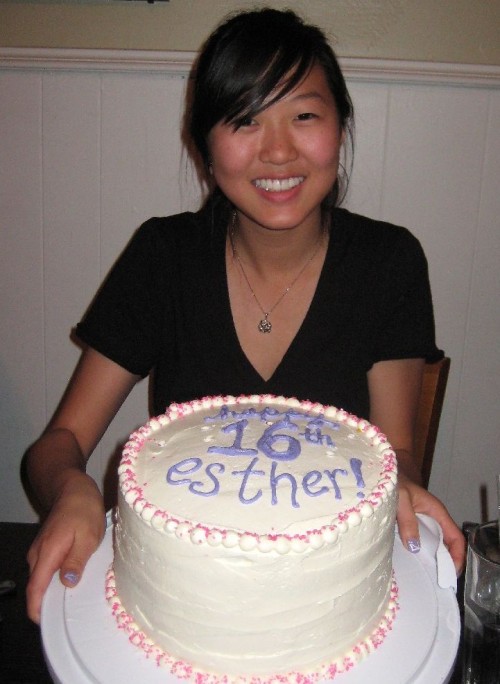
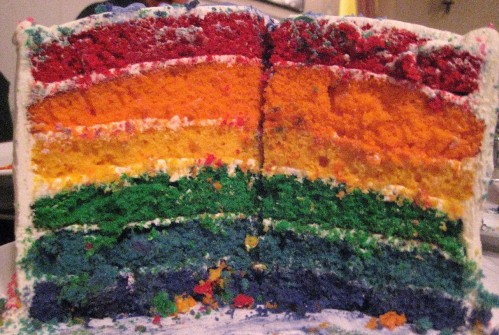
Who can forget Mr. Roy G. Biv from the days of grade school! Well we’re only working with six layers here, so we’re kinda combining the indigo with the violet, cause I could never figure out the difference between those two colors anyway. Everything else is covered–raspberries for R, orange for O, lemon for Y, lime for G, blueberries for B, and for the last layer I did a mix of raspberries and blueberries for I and V. Here’s the birthday girl! (picture quality and lighting starts to get compromised here since we’re now at the restaurant and I’m using my point and shoot)

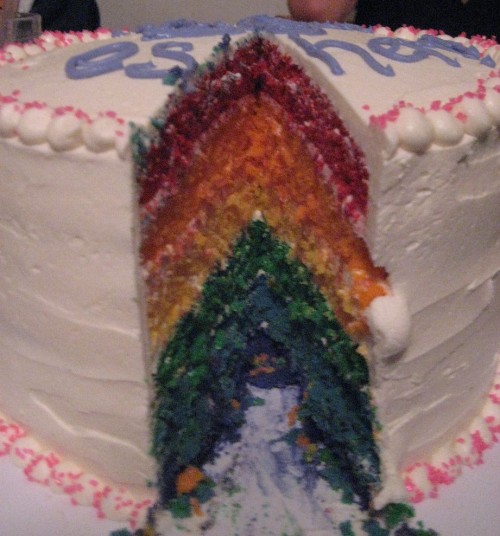
Before the cake was cut, people kept hounding me and asking what flavor it was, and I had to keep saying “wait and see”. Kids don’t like answers like that, but after waiting for it to be sliced open, they were stunned! Everyone started saying it tasted like fruit loops. I agreed – it was yummy, and all covered in a white chocolate frosting.  

This cake is sure to brighten your day. Happy New Year everyone! Three cheers for lots of love, hope, and giving for 2011.

– Ai

S’mores Cupcakes

S’mores are a fond childhood memory for me– my mom would never let us near fire of any kind, so my sister and I used to make them ghetto style on a plate in the microwave. As in, the marshmallow puffs up incredibly big, absolutely untoasted, the chocolate melts into a gooey mess, and you put it all together very quickly with the graham crackers, and voila! You have yourself a microwaved s’more. Turn on the tv and call it a self made after-school snack. We were such dorks, but not to worry, times have changed.

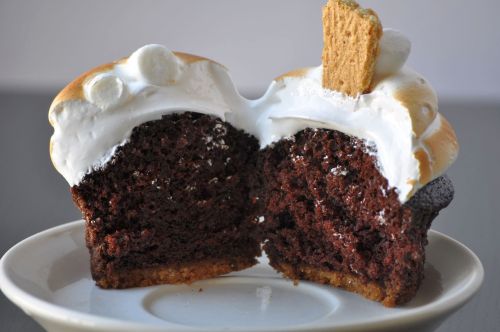
When I came across these S’more cupcakes I bookmarked it immediately so I could make them. Graham cracker crust, rich chocolate cake, topped with toasted marshmallow frosting… need I say more? Let’s just say that these cupcakes will have you coming back for S’more.

Two halves of a whole:

Don’t leave me…

If you’re going down, then I’m going with you

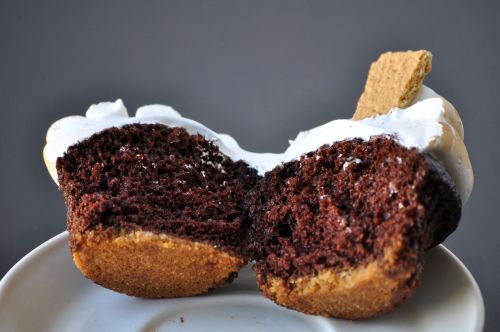
And now we’re showing everyone our bottoms.

S’mores Cupcakes
Adapted from Lovin’ From the Oven, Originally from Jennifer of Seattle’s Trophy Cupcakes

For the Crust:

1 1/2 cups graham cracker crumbs (about 20 squares pulsed in a food processor)
1/4 cup sugar
1/3 cup unsalted butter, melted

Preheat oven to 350 degrees. Line 2 standard muffin tins with cupcake liners; set aside. Place graham cracker crumbs, remaining 1/4 cup sugar, and melted butter in a large bowl; stir until well combined. Place 1 tablespoon graham cracker mixture into the bottom of each prepared muffin cup. Use the bottom of a small glass to pack crumbs into the bottom of each cupcake liner. Reserve remaining graham cracker mixture for topping.

For the CakeThis is my favorite go-to chocolate cake for practically everything

2 cups sugar
1-3/4 cups all-purpose flour
3/4 cup cocoa powder
2 teaspoons baking soda
1 teaspoon baking powder
1 teaspoon salt
2 eggs
1 cup buttermilk
1 cup strong black coffee OR 2 teaspoons powdered instant coffee plus 1 cup boiling water
1/2 cup vegetable oil
1 teaspoon vanilla extract

Stir together sugar, flour, cocoa, baking soda, baking powder and salt in large bowl. Add eggs, buttermilk, coffee, oil and vanilla; beat on medium speed of mixer 2 minutes (Batter will be thin). Pour batter evenly into prepared muffin tins.

Bake 18 minutes or until wooden pick inserted in center comes out clean. Cool 10 minutes; remove from pans to wire racks. Cool completely.

For the Marshmallow Frosting:

8 large egg whites
2 cups sugar
1/2 teaspoon cream of tartar
2 teaspoons pure vanilla extract

Place egg whites, sugar, and cream of tartar in the heatproof bowl of an electric mixer. Set over a saucepan with simmering water. Whisk constantly until sugar is dissolved and whites are warm to the touch, 3 to 4 minutes.

Transfer bowl to electric mixer fitted with the whisk attachment, and beat, starting on low speed, gradually increasing to high, until stiff, glossy peaks form, 5 to 7 minutes. Add vanilla, and mix until combined. Use immediately and then lightly torch with a kitchen burner.

Note: Be careful with the marshmallow frosting, and serve after frosting and toasting! I took half of these down to LA with me on a road trip on a hot weekend in June and the frosting started deflating and sliding. I’m sure it was a combination of the heat and the movement of the car. They still got devoured, they just didn’t quite look like what they originally did!

– Ai

Grace and William’s Wedding Cake

When I said “Coming Soon” you were probably thinking a couple days, right? Well that was my original intention too, which failed,and now it’s been over a month. Where does the time go?! An entirely separate topic altogether, but I digress. Here it is! One of my long-time friends got married at the end of July, and I had the priviledge of making her wedding cake! Grace and I go way back to our days at Cal, and we always have a blast hanging out together, catching up, laughing loudly in public without shame, sharing our obsession for Leonardo…the list goes on.

It all started with these birthday cupcakes I made for her last year–they’re Raspberry Chocolate Truffle Cupcakes:
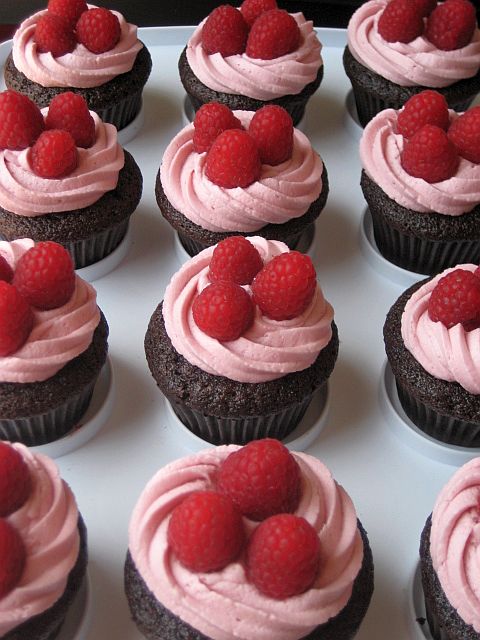
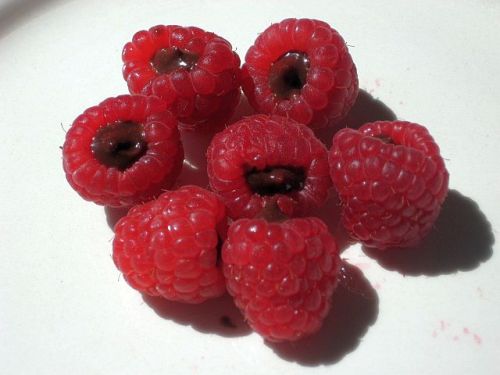
For the truffle part, the actual raspberries are filled with raspberry chocolate ganache (which is UHmazing, you can eat 30 of them, wonder what happened, and keep going) and I hid one inside the actual cupcake as well, filled the rest up with ganache, and topped the finished cupcake with the raspberries too. These cupcakes are my favorite! Bold statement, I know – they’re that good.
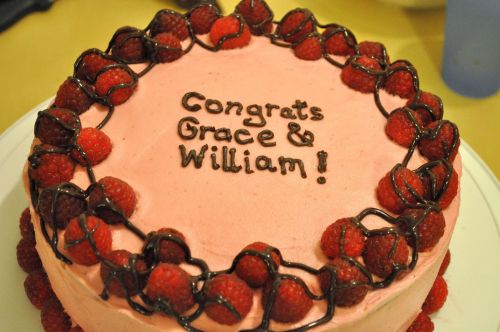
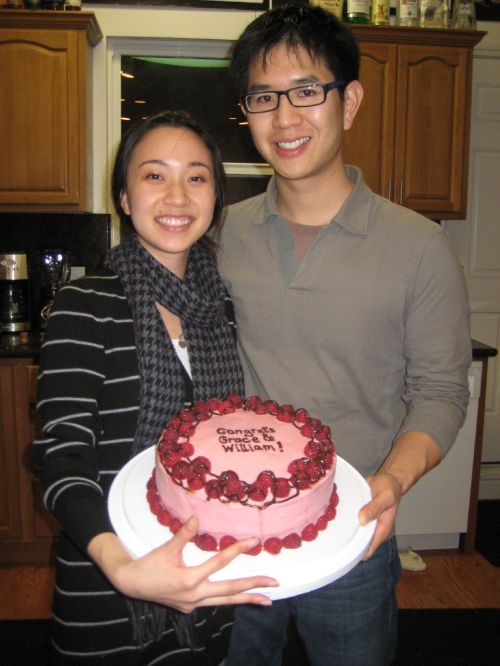
Then came the day William proposed to her with a scavenger hunt through San Francisco — we were waiting at the end for them after she said “yes!” and I made the same birthday cupcakes for them, but this time in cake form:
And then came the final cake to top off their relationship–cue drumroll–the wedding cake! I expected the week to be hectic because it’s not like I bust out wedding cakes everyday in my acre-big kitchen with marble-topped counters and islands in between with a commercial dishwasher and walk-in refrigerator (I dream big, daily). But it was really crazy–I was still adjusting to balancing 2 jobs, the baker job was new so I was climbing the learning curve and getting used to the early mornings, not to mention that week happened to also be the end of the month for sales at my second job so I was working overtime to make numbers and quota, and then there was the cake. By the end of the week I had to haul butt as a delirious zombie running on very little sleep (looking back it’s become a hazy blur), but the cake was finally done! Bf did a wonderfully supportive job again of coming over, washing lots and lots of butter-covered dishes and pans, and on the last night he even made sure I was awake and stayed up with me until I finally finished the cake in the wee hours of the morning. He also was a huge factor in helping me transport the cake, assembling it on site, and encouraging me like always. I’m a lucky gal.

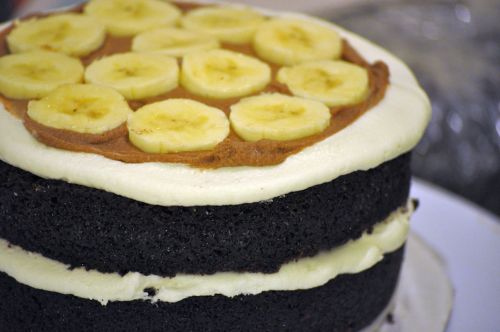
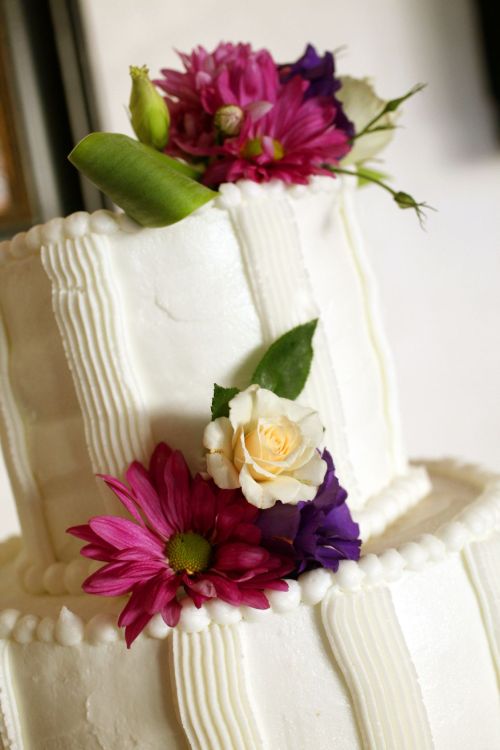
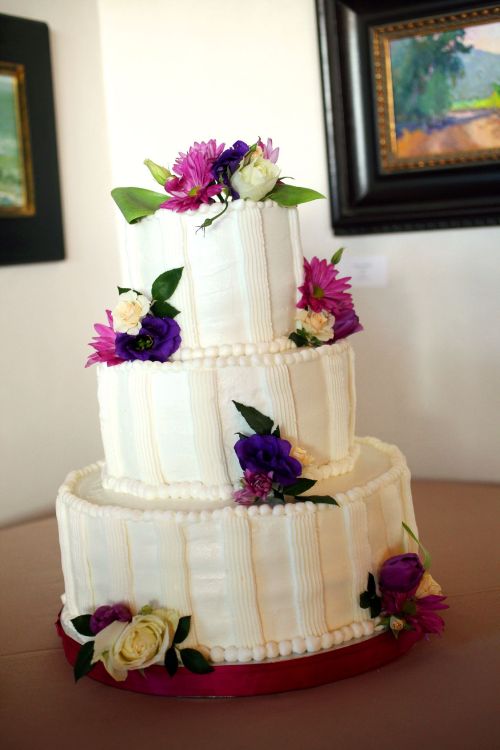
The bride and groom choose 2 flavors — Lemon Raspberry with Lemon Curd, and Dark Chocolate with Kahlua Mocha Buttercream. The groom likes bananas, so I made the very top layer Chocolate banana so they could eat that after the honeymoon:
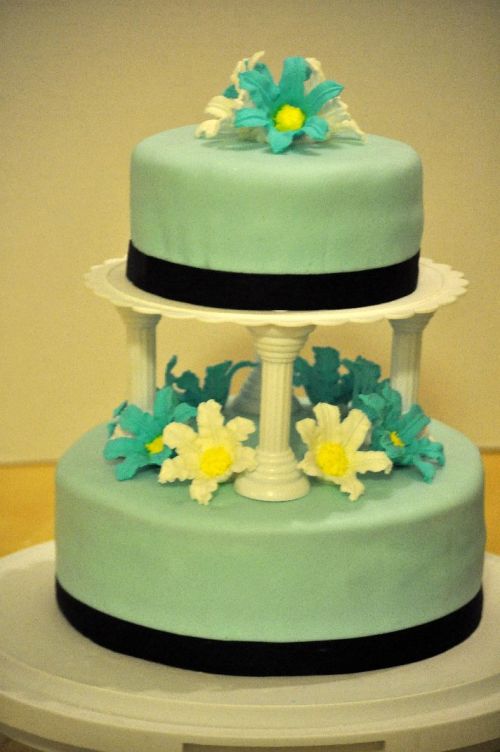
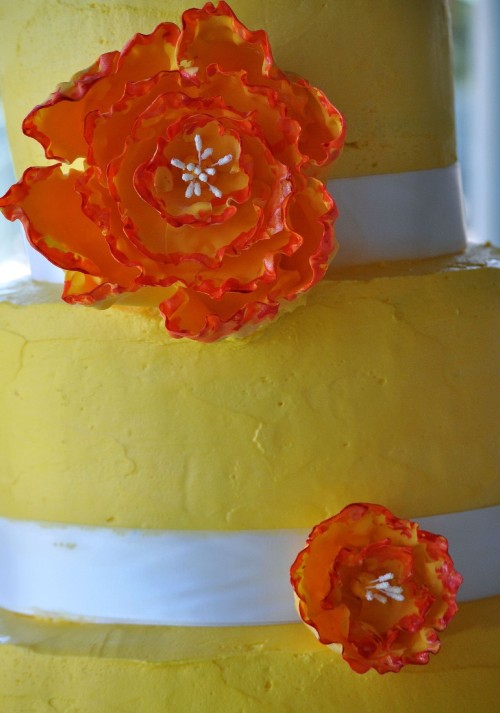
The cake was decorated with gumpaste flowers layered on top of each other. I underestimated the time it would take to make these, since you have to color, roll out, cut, ruffle and attach each layer, and let them dry hard before assembling with gumpaste glue. Had I thought of it earlier, they should have been all been made ahead of time since they had to dry overnight. One of my friends who witnessed the process affectionately called them tostada flowers because each layer on its own looks like a taco shell boat. When she first said that I wasn’t sure whether to laugh or cry, but it eventually all came together.
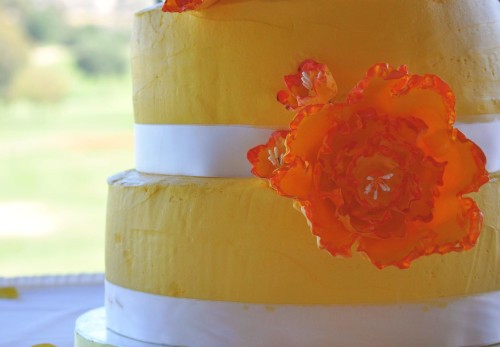
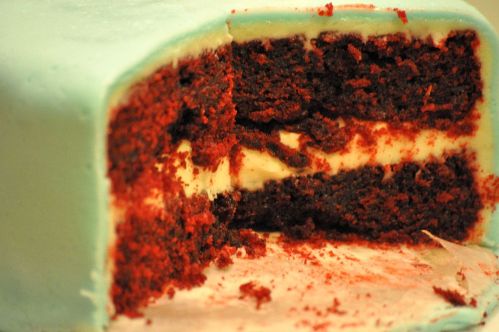
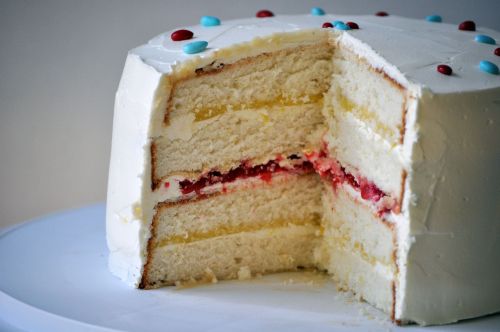
Got lots of raves about a wedding cake actually tasting delicious! That made me really happy because I was really nervous about the entire cake, which I think will never change when you’re dealing with someone’s wedding cake – huge once in a lifetime opportunity! Nuff said. Here it is sliced up! I didn’t get a picture of the chocolate part, but this is the lemon raspberry part:

Congrats again Grace and William! It was an honor for me to be part of your big day. Enjoy life in Philly, and I will see you again soon!
– Ai

Lemon Curd Cake
Adapted from Epicurious (makes about 7.5 cups of batter)

For lemon curd
2 1/3 cups sugar
2 teaspoons cornstarch
1 cup fresh lemon juice
4 large eggs
4 large egg yolks
3/4 cup (1 1/2 sticks) unsalted butter, cut into 1/2-inch pieces

Combine 2 1/3 cups sugar and 2 teaspoons cornstarch in heavy medium saucepan. Whisk in fresh lemon juice. Whisk in eggs and yolks; add butter. Whisk constantly over medium heat until curd thickens and boils, about 12 minutes. Strain through a sieve into a medium bowl. Refrigerate until cold, at least 5 hours. Cover with plastic wrap touching the surface and keep refrigerated.

For cake
1 1/2 cups cake flour
1 1/2 cups sugar
2 1/2 teaspoons baking powder
3/4 teaspoon salt
4 large egg yolks
1/4 cup vegetable oil
1/4 cup orange juice or lemon juice
1 1/2 teaspoons grated lemon peel
8 large egg whites
1/4 teaspoon cream of tartar

Preheat oven to 350°F. Butter and flour three 9-inch-diameter cake pans with 1 1/2-inch-high sides; line bottoms and sides with parchment paper.

Whisk cake flour, just 1/2 cup sugar, baking powder and salt in large bowl. Add yolks, oil, juice, lemon peel and 3/4 cup lemon curd to bowl (do not stir). Combine whites and  cream of tartar in another large bowl, and beat whites until soft peaks form. Gradually add remaining 1 cup sugar, beating until stiff but not dry. Using same beaters, beat yolk mixture until smooth. Fold whites into yolk mixture in 3 additions.

Divide batter equally among prepared pans. Bake cakes until tester inserted into center comes out clean, about 25 minutes. Cool cakes in pans on racks 15 minutes. Turn cakes out onto racks; peel off parchment. Cool cakes completely.

Dark Chocolate Cake
Adapted from Hershey’s (Makes about 5.5 cups batter)

2 cups sugar
1-3/4 cups all-purpose flour
3/4 cup unsweetened cocoa
2 teaspoons baking soda
1 teaspoon baking powder
1 teaspoon salt
2 eggs
1 cup buttermilk
1 cup strong black coffee OR 2 teaspoons powdered instant coffee plus 1 cup boiling water
1/2 cup vegetable oil
1 teaspoon vanilla extract

Heat oven to 350°F. Grease and flour two 9-inch round baking pans or one 13x9x2-inch baking pan.

Stir together sugar, flour, cocoa, baking soda, baking powder and salt in large bowl. Add eggs, buttermilk, coffee, oil and vanilla; beat on medium speed of mixer 2 minutes (Batter will be thin). Pour batter evenly into prepared pans.

Bake 30 to 35 minutes for round pans, 35 to 40 minutes for rectangular pan or until wooden pick inserted in center comes out clean. Cool 10 minutes; remove from pans to wire racks. Cool completely. Yields 10 to 12 servings. 

Kahlua Mocha Buttercream

1/2 cup (1 stick) butter, softened
2 1/2 cups powdered sugar
1 Tablespoon unsweetened cocoa
1/4 cup whipping cream
1 teaspoon instant coffee granules
1 teaspoon Kahlua

Beat butter, powdered sugar, and cocoa at medium speed until fluffy.

Microwave whipping cream until warm (do not boil), about 15-20 seconds. Stir together warm cream and coffee granules until dissolved, and cool. Slowly add coffee-cream mixture in 1 tsp increments and liquor to butter mixture, beating until smooth.
 

Coming soon…

Oh blog, how I’ve neglected you for quite a while now. It’s not that I haven’t been baking–in fact, perhaps I’ve been baking too much. Yes, it is possible. In the beginning of July I actually got a second job at a bakery making cupcakes! So between waking up early in the mornings to bust out hundreds of cupcakes (working in a commercial kitchen is no joke), my other full-time job afterwards, and a wedding cake that was completed on the last day of July, you could say it’s been busy. I’m still recuperating from the wedding cake. The week  after, I had to will myself to not step in my kitchen or wash a dish for at least 24 hours. But I am still standing. I even went to the gym today *amazing* and tackled the good ol’ elliptical with sweat and tears.

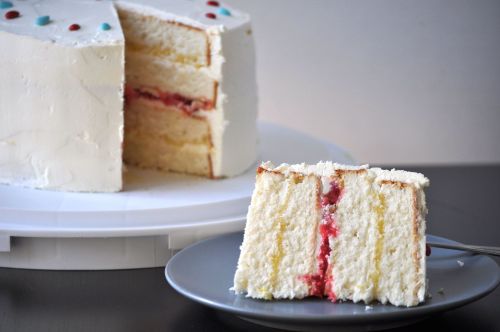
So hang tight… and there will be a wedding cake post coming up soon, along with all the other things I’ve baked but the only proof lies in the people who ate it, and the pictures in my desktop folder titled “TO POST”. Here’s a preview of a test run I had to do for the wedding cake:

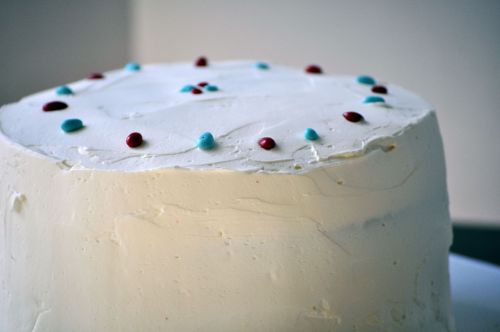
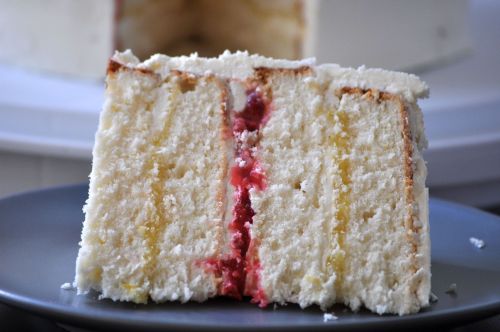
 This is lemon raspberry, the flavor of choice by the bride! Lemon curd is sandwiched in between, along with fresh raspberries. Sweet and tangy, and covered in a meringue buttercream.

That slice is for you, and this one is for me:

More to come!

Ai

Red Velvet Cupcakes with Cinnamon Cream Cheese Frosting

Yup, it’s the popular cake choice among the masses, always getting lots of ooohs and ahhs. What is it that makes red velvet so darn popular? Maybe it’s the red color that draws people in, or is it the actual flavor, the not so sweet but with a hint of chocolate thing going on? The velvety texture? I think it might be a bit of everything. This is probably my 6th recipe of red velvet. Every time I search for a recipe, I always google it and try to compare them side by side in a bunch of open windows on my computer — what are the ingredient differences, the measurement differences, the various mixing methods, reviews, etc. Well let me tell you, for red velvet, there are hundreds of recipes out there. Let’s take a look back at a brief history of my relationship with red velvet:

My first attempt ever at Red Velvet (this was years ago). Looks good, but tastes like playdoh – yeah, gross. Proof that you can’t  judge a cupcake by its picture alone. I ended up bringing them to church on a Sunday and felt horrified every time someone put it in their mouth. I’d scream at them “Wait, please just throw it away! You don’t have to finish it! Spit it out NOW!” and they would look at me like a crazy woman. I should have just thrown the whole batch away, but nope, there’s this tiny person inside of me that says I must not waste food, even if it tastes like dog food. I can’t even remember which recipe I used for this one, but I’m sure I already trashed it. A couple months later I gathered up the courage to try again:

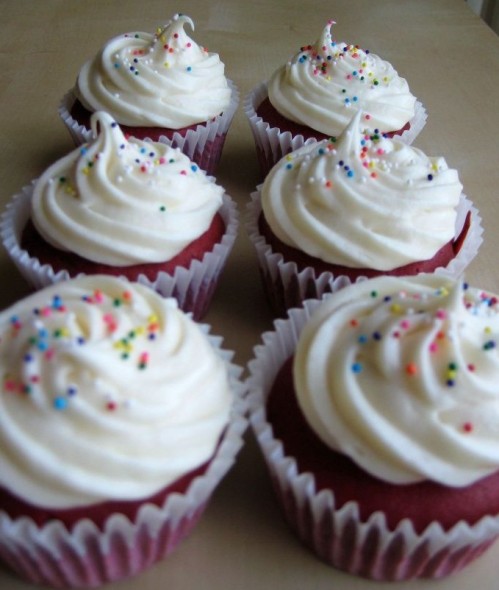
This is a recipe from Baked that I came across in a Oprah magazine someone left in the lunchroom at work. The magazine ended up coming home with me and this was a success! Of course, I can’t remember all too clearly what it tasted like since it was a while ago and before my blogging days, but I do remember it was well praised. The frosting was a cinnamon cream cheese frosting which really added a flavor kick to it.

Then came this project:

Red Velvet Cheesecake! This one was great too (can you tell my relationship with RV is getting better as time goes on?), and everyone got excited when they cut the cake open to find out it was red velvet layered with white chocolate cheesecake. I can’t take credit for this idea though–it was inspired by Stefanie’s Ultimate Red Velvet Cheesecake at the Cheesecake Factory. The red velvet cake was from Martha Stewart – nice and moist, and the White Chocolate Cheesecake recipe was from the Williams-Sonoma Baking Book.

Here’s one of my first fondant cakes with red velvet:

A lot of people aren’t great fans of fondant, but the marshmallow fondant pictured here is the way to go. You have to make it yourself though, so it’s not as convenient as fondant from a tub, and it’s a little softer to work with, but it’s worth it. But I digress… fondant is a whole other story for later. Maybe. I can’t remember where this red velvet cake recipe is from either… sigh. There was also another red velvet cupcake experience I have as a memory in my head, but for that too –  I can’t find any pictures on my computer. Then there’s also the recent red velvet wedding cake that I made as well. Good thing I started blogging since I’m pretty sure nobody will believe me without any picture evidence.

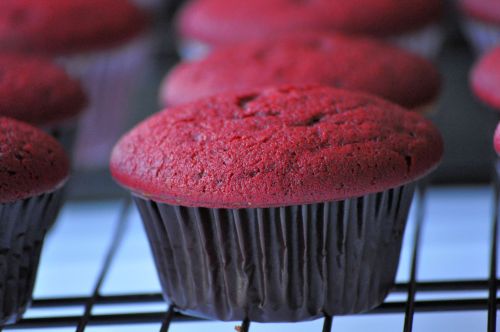
Which finally brings me to these Red Velvet Cupcakes from the Hummingbird Bakery Cookbook. One of the reasons I stuck with Martha Stewart’s Red Velvet for so long is because it’s one of the recipes that uses oil instead of butter. I had heard somewhere on television that the key to a moist red velvet cake is to use oil instead of butter, so I’ve been sticking to oil as my fat of choice. But I came across these from Joy the Baker (I’m a huge fan), and this is her token Red Velvet recipe, so I definitely had to try it and I’m so glad I did! I tucked it in the back of my mind and said I’d make it the next time a red velvet lover’s birthday comes around. Here they are naked:

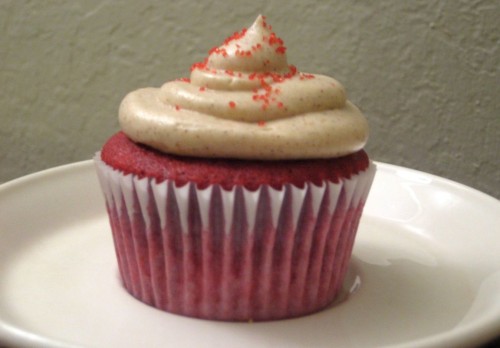
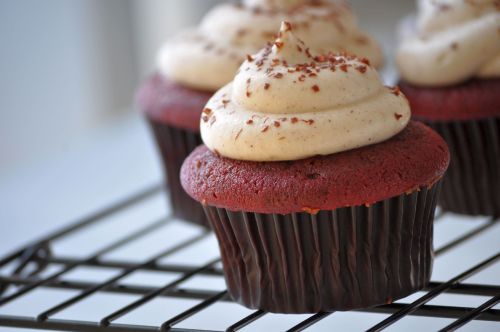
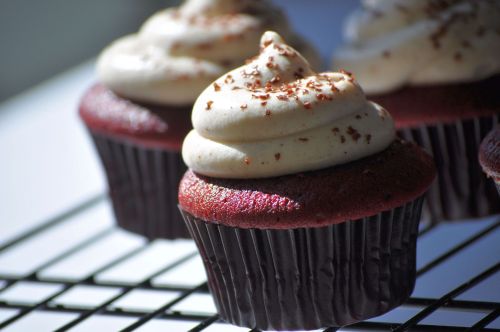
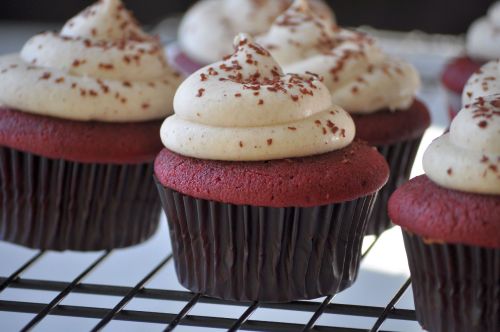
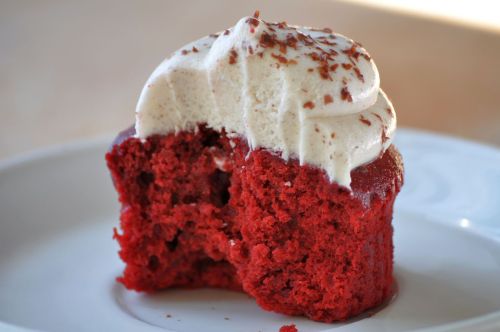
And guess what, these are moist, without being oily. I am not a fan of oily, how unattractive. Anyway, this scored big time! These were scarfed down by the birthday boy and others as they stayed up all night a couple weeks ago to watch Korea beat Greece in the World Cup. For the frosting, I made a Cinnamon Cream Cheese Frosting that has become my favorite for red velvet–the cinnamon flavor adds a warm flavor to the frosting, while the cream cheese still stays tangy without being super sweet. A chocolate bar was grated on top, and I was done! I got tons of raves (yessss)!

My favorite picture:

I so want to eat one right now. Go red!

-Ai

Red Velvet Cake
From The Hummingbird Bakery Cookbook, found on Joy the Baker
makes 2 8-inch or 9-inch round cakes, or about 2 dozen cupcakes

8 Tablespoons unsalted butter, at room temperature
1 1/2 cup sugar
2 eggs
5 Tablespoons unsweetened cocoa powder
4 Tablespoons red food coloring mixed with 2 Tablespoons water
1 teaspoon vanilla extract
1 cup buttermilk
2 1/4 cups all-purpose flour
1 teaspoon salt
1 teaspoon baking soda
3 teaspoons distilled white vinegar

Preheat oven to 350F. Grease and flour two 8-inch or 9-inch round cake pans, or line cupcake pans.

In the bowl of a stand mixer fit with a paddle attachment, cream the butter and sugar until light and fluffy, about three minutes.  Turn mixer to high and add the eggs.  Scrape down the bowl and beat until well incorporated.

In a separate bowl, mix together cocoa, vanilla and red food coloring to make a thick paste.  Add to the batter, mixing thoroughly until completely combined.  You may need to stop the mixer to scrape the bottom of the bowl, making sure that all the batter gets color.

Turn mixer to low and slowly add half of the buttermilk.  Add half of the flour and salt and mix until combined.  Scrape the bowl and repeat the process with the remaining milk and flour.  Beat on high until smooth.
Turn mixer to low and add baking soda and white vinegar.  Turn to high and beat a few more minutes.

Spoon batter into prepared cake pans and bake for 25-35 minutes or until a skewer inserted into the center comes out clean. For cupcakes, bake at 325 F for 20-25 minutes until toothpick inserted into center comes out clean.

Let rest in the pan for 20 minutes, then invert onto a cooling rack to cool completely before frosting.

Cinnamon Cream Cheese Frosting
Adapted from my usual cream cheese frosting, but with cinnamon!

2 blocks cream cheese (two 8oz packages), at room temperature
1/2 cup (1 stick, 8 Tbsp) unsalted butter, at room temperature
1 teaspoon ground cinnamon
2-3 cups powdered confectioners’ sugar, sifted

Beat the cream cheese in a mixer until smooth, with the paddle attachment. Add in the butter and beat until smooth. Add in cinnamon (my estimate is about a teaspoon, it might be more. I kept on adding and adding until I liked the flavor, so you might want to just sprinkle it in slowly at first and taste test). Add in the sugar 1 cup at a time, until desired sweetness, and beat until smooth.
Ice Cream Cupcakes

Hello, summer! You make my apartment hot and stuffy, you take away all air circulation, and you make me sweat like no other. But you also brighten my mood with the sun, you make me want to play instead of work, and I want to eat ice-cream all day long. Sometimes I like you and sometimes I don’t. It’s complicated.

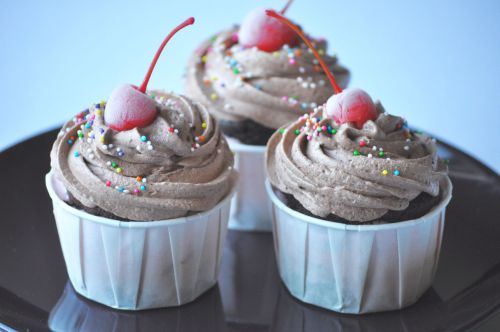
So of course, when it came time to celebrate my roommate’s birthday, which comes right at the beginning of summer, my mind naturally diverted to ice-cream in the form of cupcakes (duh what else). These cupcakes are really simple to make if you’re in a cool environment and you happen to have air conditioning in your kitchen. Or if your place is like mine, the apartment is a huge sauna and using your oven brings your apartment to a nice 102 degrees. There’s a lot of standing in front of the fan combined with sticking your head in the freezer for five minute intervals, wondering how that’s going to affect your electricity bill.

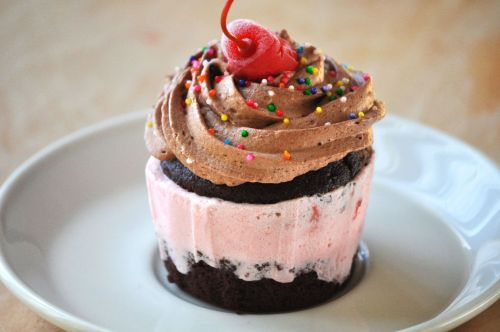
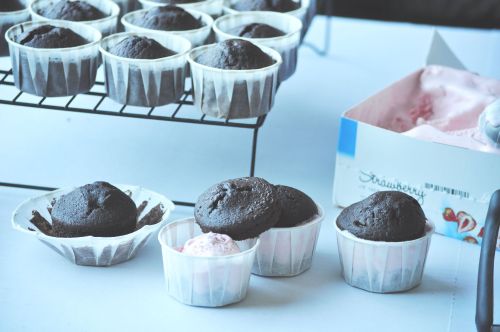
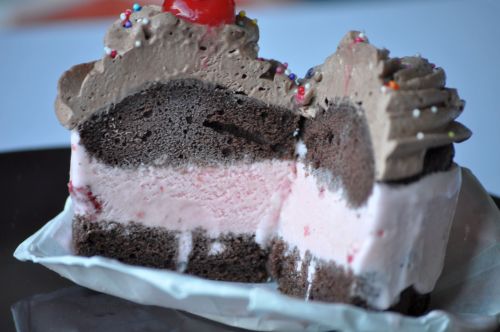
The first step is to bake the cupcake part, which can be any flavor you’d like. I did the classic chocolate-strawberry combination, so my cake was chocolate paired with strawberry ice-cream. If you’re short on time, you can even use a box mix, or my go-to Black Magic cake. Baking them in party nut cups (found at Smart & Final) make it easy because then they’re the perfect size when you’re assembling. Only fill them up 1/2 way, versus the normal 3/4 of the way, since you’ll need the extra room for the ice-cream in the middle.

After the cupcakes are cooled, unwrap them, horizontally slice then in half, and place the bottom part in a brand new cup. Then fill with a scoop of softened ice-cream, smooth it out to the edges, and top it with the other half of the cupcake. It starts to get real messy if it’s hot, and things were turning into ice-cream soup within minutes. I had to revert to factory style – removing all the liners on the cupcakes first, then cutting all of them in half and placing the bottoms in new cups, scooping the ice-cream into one, covering it with the top and throwing it in the freezer before I could start on the next one.

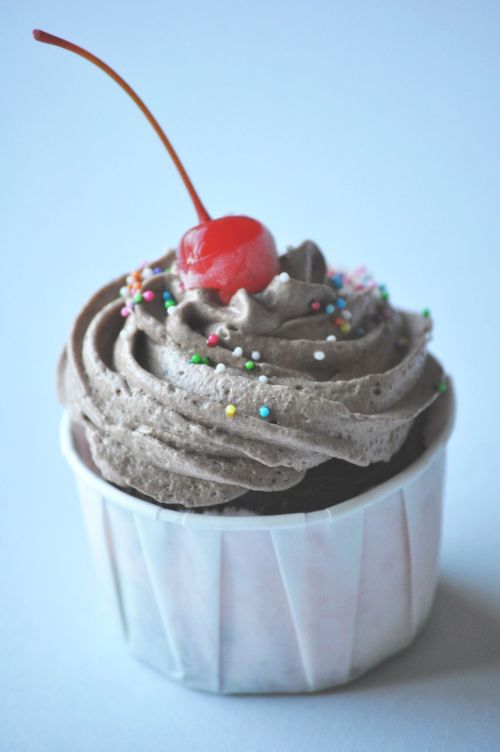
Let them all sit on a cookie sheet in your freezer for a good 2-3 hours so they’re nice and solid before you frost. The frosting I used is my go-to frosting for ice-cream cake, recipe found below. It holds up well in the freezer and turns soft enough pretty quickly when people are trying to devour cake (frozen rock hard buttercream is not fun to eat).  Toss on some sprinkles, top it off with a maraschino cherry, and tuck it away in the freezer where it stays until the party starts.

You can see the melting process happening as I’m trying to take this picture:

I had friends hide in the dark of our apartment as a birthday surprise and when my roomie came home she found 15 people in our living room, screamed, and almost had a heart attack. Fantastic! This old grump that lives below us then stormed upstairs to yell at us for being so loud (party pooper), then I busted these out and everyone had a great time. Happy birthday Anne!

– Ai

Frosting for Ice-Cream Cake/Cupcakes

1 cup cold milk
1 package of instant pudding mix (4-serving size, 3.4 ounces), any flavor, I used chocolate pudding mix
1 16oz. tub of frozen whipped topping (aka Cool Whip), softened

Pour the cold milk into a large bowl, and then whisk in the pudding mix. Keep whisking until it thickens. Putting it in the refrigerator for a little bit also helps to thicken it up, about 15-20 minutes. Stir until smooth, and then gently fold in whipped topping until incorporated. Fill a piping bag and frost cupcakes, then return cupcakes back into the freezer.

Strawberry Filled Cupcakes

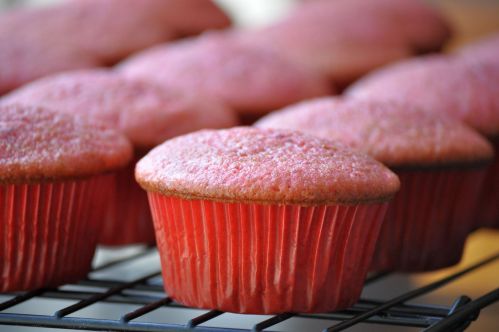
Pink has always been a color that was just too girly for me, and I was more of a blue and gray kind of person. I thought pink clothing was uncool, but my wardrobe also consisted of hand-me-downs from my big sister. Explains a lot, right? When I made these cupcakes and the end result was lots of pink, I was completely ecstatic. The inner princess in me came out: Pink cupcakes rock!

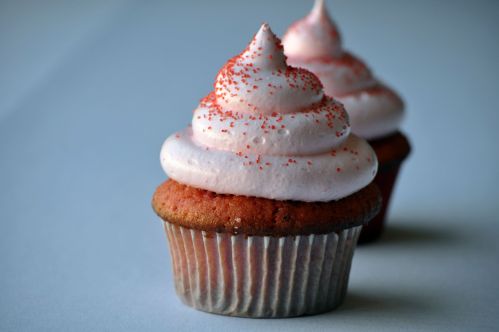
This cupcake is so easy to make (you’ll be surprised when you see what’s in it), and I actually made these twice – once for a birthday girl and again for my road trip down to LA. It was covered in light, fluffy, fat-free frosting. Fat-free might sound strange and not yummy, but Seven Minute frosting is a recent discovery of mine. It tastes just like marshmallow, and there’s no greasy buttercream feel to it, although it does take a little longer than seven minutes to make. Gives you a reason to eat more! Hot outta the oven:

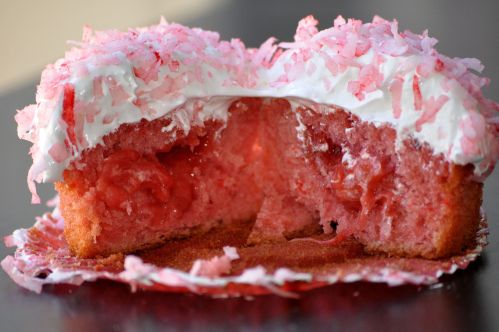
The center was filled with real strawberries, using the cone method. Getting exposed and then dissected:

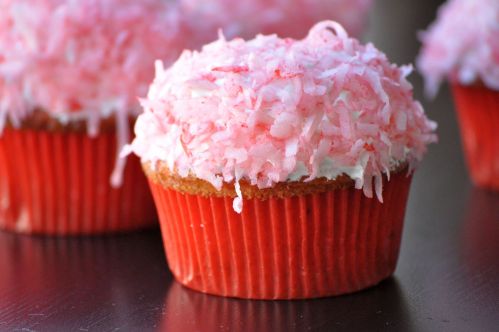
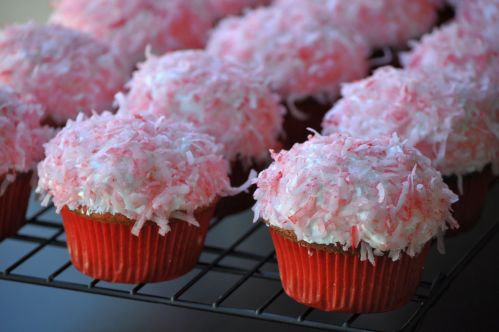
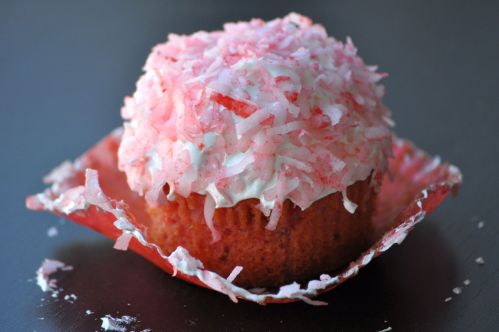
I decorated in two different ways. One was the “dome top”, where I used an ice-cream scoop, scooped out a wallop of frosting onto the cupcake, and brought it to the edges to make a dome shape with my offset spatula. You can roll it around in anything, like pink-dyed coconut flakes, sprinkles, mini-chocolate chips, or crushed oreos. The other way you can frost it is by using a piping bag and a large round tip to make the “doodie swirl”, affectionately named for obvious and hilarious reasons (yup, I am so immature):  

Go and make pink! If just looking at them makes you happy, think about how you’ll feel inside after you scarf em’ down savor each bite like a proper lady.

– Ai

Southern Style Strawberry Cake
Adapted from Joy the Baker, recipe from Sweets
Makes about 22 cupcakes

1 (18.5 ounce) box white cake mix (without pudding)
1 (3 ounce) package strawberry jello
1 Tablespoon self rising flour
4 teaspoons granulated sugar
3/4 cup vegetable oil
4 eggs
1/2 cup water
1/2 cup fresh strawberries, finely diced. (frozen works too)

Preheat the oven to 350F.  

Mix together the cake mix, jello mix, flour and sugar in a large bowl. Add the oil. Add the eggs one at a time, beating well after each addition. Add the water and strawberries and mix well.  Divide the batter evenly into three 8-inch round baking pans that have been oiled and floured (or fill lined cupcake pans with a 2oz ice-cream scoop). Bake for 25-35 minutes (18-20 minutes for cupcakes), and a toothpick inserted into the center comes out clean.

Transfer to wire racks and let cool, still in their pans, for 10 minutes. Then remove from the pan and let cool completely on the rack before frosting.

Strawberry Filling
Adapted from Wilton
Makes 2 cups filling

1 pkg (16 ounces) frozen strawberries, unsweetened and thawed
1/3 cup granulated sugar
3 tablespoons cornstarch
1 teaspoon lemon juice

In large saucepan, combine strawberries, sugar, cornstarch and lemon juice; mix well. Heat and stir until mixture boils and thickens, about 5 minutes. Cool completely. Refrigerate until ready to use. Can also be made with blueberries, pineapples, or raspberries.

Seven Minute Frosting
From Epicurious

For these cupcakes, I wanted the extra strawberry flavor without it being too sweet, so I added in 2 Tablespoons of strawberry jello mix, and only put in about 3/4 cup white sugar.

1 cup plus 2 tablespoons sugar
1/3 cup water
3 large egg whites
1/4 teaspoon cream of tartar
1/8 teaspoon salt
1 tablespoon pure vanilla extract

In large metal bowl, whisk together 1/3 cup water, sugar, egg whites, cream of tartar, and salt. Set bowl over pan of barely simmering water and mix with handheld electric mixer at low speed. Gradually increase speed to high, beating until mixture holds stiff peaks, about 5 minutes (mine took about 9-10 minutes).

Transfer bowl from pan to folded kitchen towel on counter and continue beating until mixture is cool and billowy, about 2 minutes more. Beat in vanilla. Frosting can be made 4 hours ahead and chilled, covered.

Peanut Butter Marbled Brownies


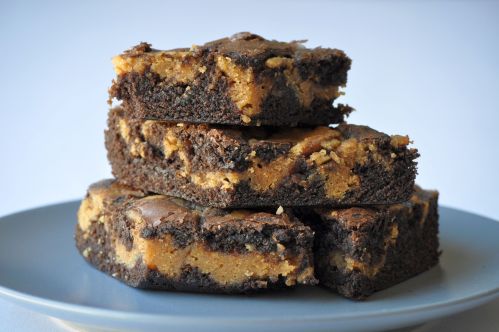
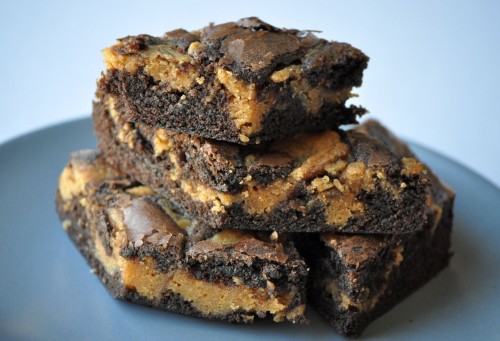
These brownies were made for a recent road trip down to LA with bf.  Brownies are so addicting and easy to make–everytime I bake them I’m always cutting off corners and popping them into my mouth. This time I was looking for a twist of the usual, and I came across these Peanut Butter Brownies with swirled into the top. They’re rich, moist, crumbly yet fudgy, and it tasted like a peanut butter cup in the form of a brownie. 

If you’re lacking time, just use a brownie box mix from the store as your base, add in the peanut butter mixture, and I promise nobody will be able to tell the difference. Some people call that cheating. Those people probably don’t have full time jobs. No judgement here. Let’s have another look:

These weren’t the only thing I baked for the trip… Strawberry Cupcakes are coming up next!

-Ai

Peanut Butter Marbled Brownies
from Allrecipes

Peanut Butter Swirl:

1 (8 oz) package cream cheese, softened
1/2 cup peanut butter
1/4 cup white sugar
1 egg
2 Tablespoons milk

Brownie Base:

1 cup butter or margarine, melted
2 cups white sugar
2 teaspoons vanilla extract
3 eggs
3/4 cup unsweetened cocoa powder
1 1/4 cups all-purpose flour
1/2 teaspoon baking powder
1/4 teaspoon salt
1 cup semisweet chocolate chips (optional)

1. Preheat oven to 350F. Grease a 9×13 inch baking pan.
2. In a medium bowl, beat cream cheese, peanut butter, 1/4 cup white sugar, 1 egg, and milk until smooth. Set aside.
3. In a large bowl, mix together melted butter, 2 cups white sugar, and vanilla. Mix in the 3 eggs one at a time, beating well after each addition. Combine flour, cocoa, baking powder, and salt in a separate bowl, then mix into the batter. Stir in chocolate chips if desired.
4. Remove 3/4 cup of the chocolate batter, and pour the rest of the batter into the prepared pan. Spread the peanut butter filling over the top. Drop the reserved chocolate batter by teaspoonful over the filling. Using a knife, gently swirl through for a marbled effect.
5. Bake for 35 to 40 minutes, or until a wooden toothpick inserted near the center comes out almost clean. Cool completely before cutting into bars 

Panna Cotta with Blueberries

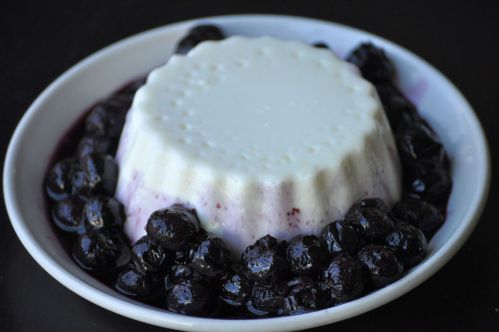
One night we went to a Mediterranean Restaurant for dinner and as a rare treat, we decided to order dessert afterwards. I wasn’t even sure what Panna Cotta was exactly, but our server highly recommended it, and it came out in a large round wine glass with a layer of caramel on top. It was fantastic–very light, creamy, yet rich and refreshing too. I made a mental note to go home and learn how to make this myself.

It’s amazing how simple and quick this is to make with just a few ingredients, and because there’s gelatin to hold everything together, it’s pretty hard to mess up. You also get to make it ahead of time, so if you have guests over, all you have to do is unmold it, plate it, garnish it, and serve. It’s a great summer dessert, and you can also adjust the amount of cream and milk–I did about half cream and half milk to total 4 cups in an attempt to cut out a little of the fat, but it was still nice and creamy. Instead of caramel, I made a blueberry sauce I to go over it, and it was a hit. Now go make it and impress people!

– Ai

Panna Cotta
From David Lebowitz

4 cups heavy cream (or half-and-half)
1/2 cup sugar
2 teaspoons of vanilla extract
2 packets powdered gelatin (about 4 1/2 teaspoons)
6 Tablespoons cold water

1. Heat the heavy cream and sugar in a saucepan until sugar is dissolved, remove from heat and stir in the vanilla extract.

2. Lightly oil eight custard cups with a neutral-tasting oil. I lightly sprayed my large muffin tin with a thin coat of Pam.

3. Sprinkle the gelatin over the cold water in a medium-sized bowl and let stand for 5 minutes until it has bloomed.

4. Pour the very warm Panna Cotta mixture over the gelatin and stir until the gelatin is completely dissolved.

5. Divide the Panna Cotta mixture into the prepared cups, then chill them until firm, which will take at least 2-4 hours or even overnight covered with plastic wrap. If you’re pressed for time, pour the Panna Cotta mixture into wine goblets so you can serve them in the glasses, without unmolding.

6. Run a sharp knife around the edge of each Panna Cotta and unmold each onto a serving plate, and garnish as desired.

Blueberry Sauce
From Alice at Savory Sweet Life

2 cups frozen blueberries
1 cup sugar
1/2 cup water
2 teaspoons grated orange zest/rind (lemon zest works too)

Cook blueberries, sugar, and water on medium-high heat for 10 minutes, stirring occasionally. The fruit will start to break down. Turn heat off and stir in orange rind. Makes approx. 1 1/4 cups of sauce.


Subscribe to this blog and receive notifications of new posts by email:

Join 29 other subscribers